Invoicing Made Easy: A Step-by-Step Guide to Creating and Managing Invoices
Steps to Create an Invoice
Creating an invoice involves several steps to ensure accuracy and completeness. Here's a step-by-step guide:
Generate an Invoice from an Order:
Step 1: Go to the sales option on the top bar and select the sales order option.

Step 2: Select the sales order for which you would like to create an invoice.
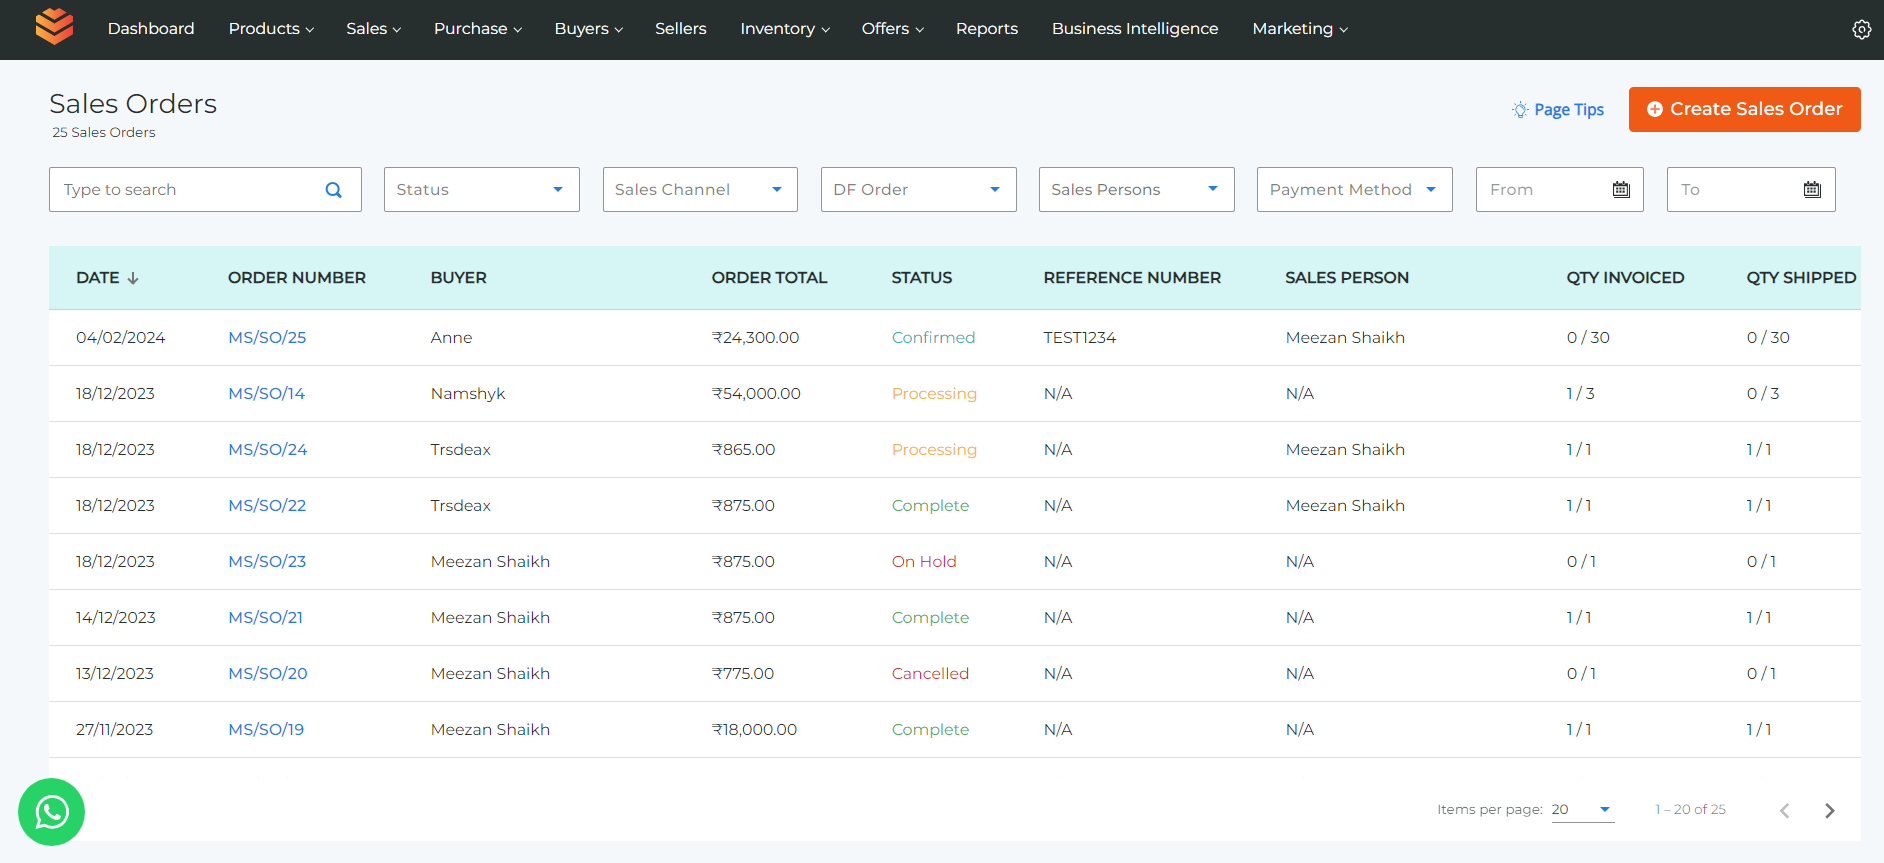
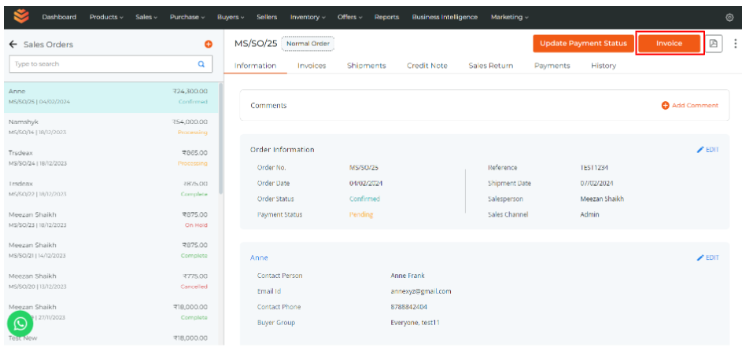
Step 3: Click on the invoice option on the top right corner if available, if it is not available then that means all the items in the order have been invoiced.
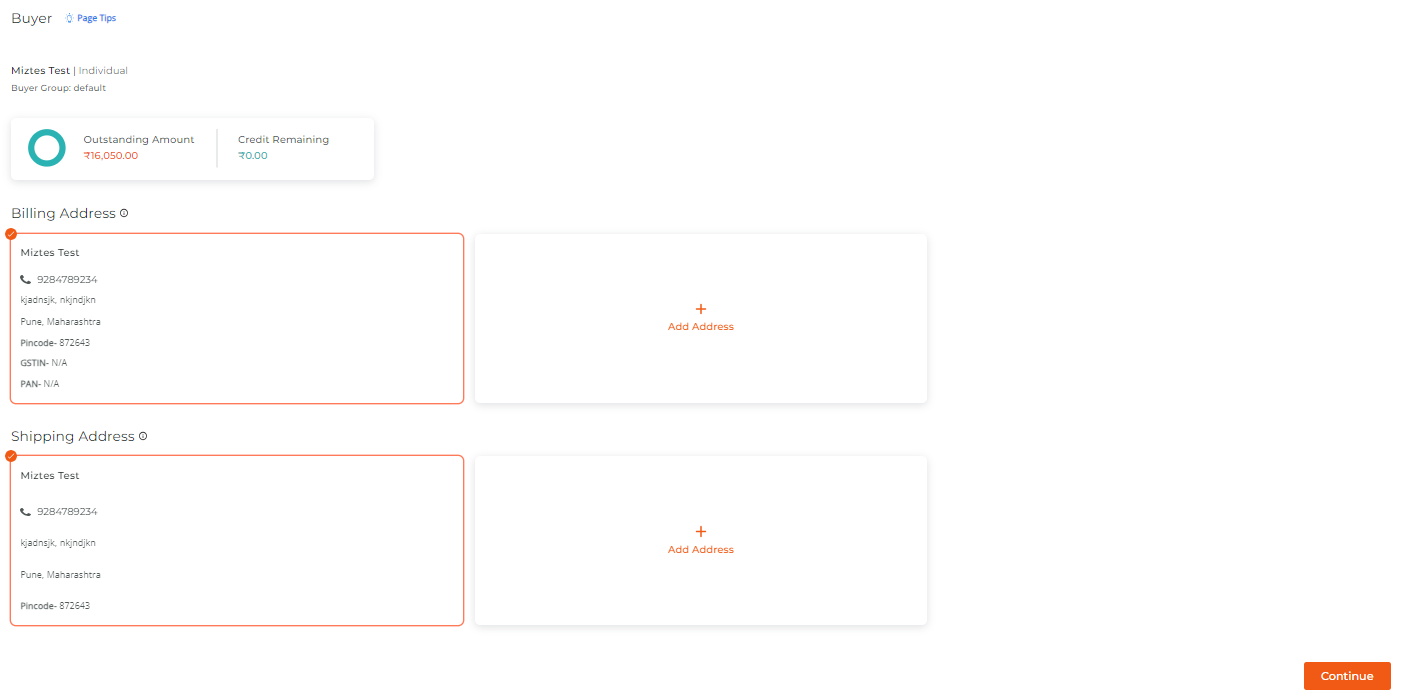
Step 4: A Buyer page will appear then select the billing and shipping address of the buyer and click "Continue".
Step 5: Select your warehouse from where you want to ship the product/s.
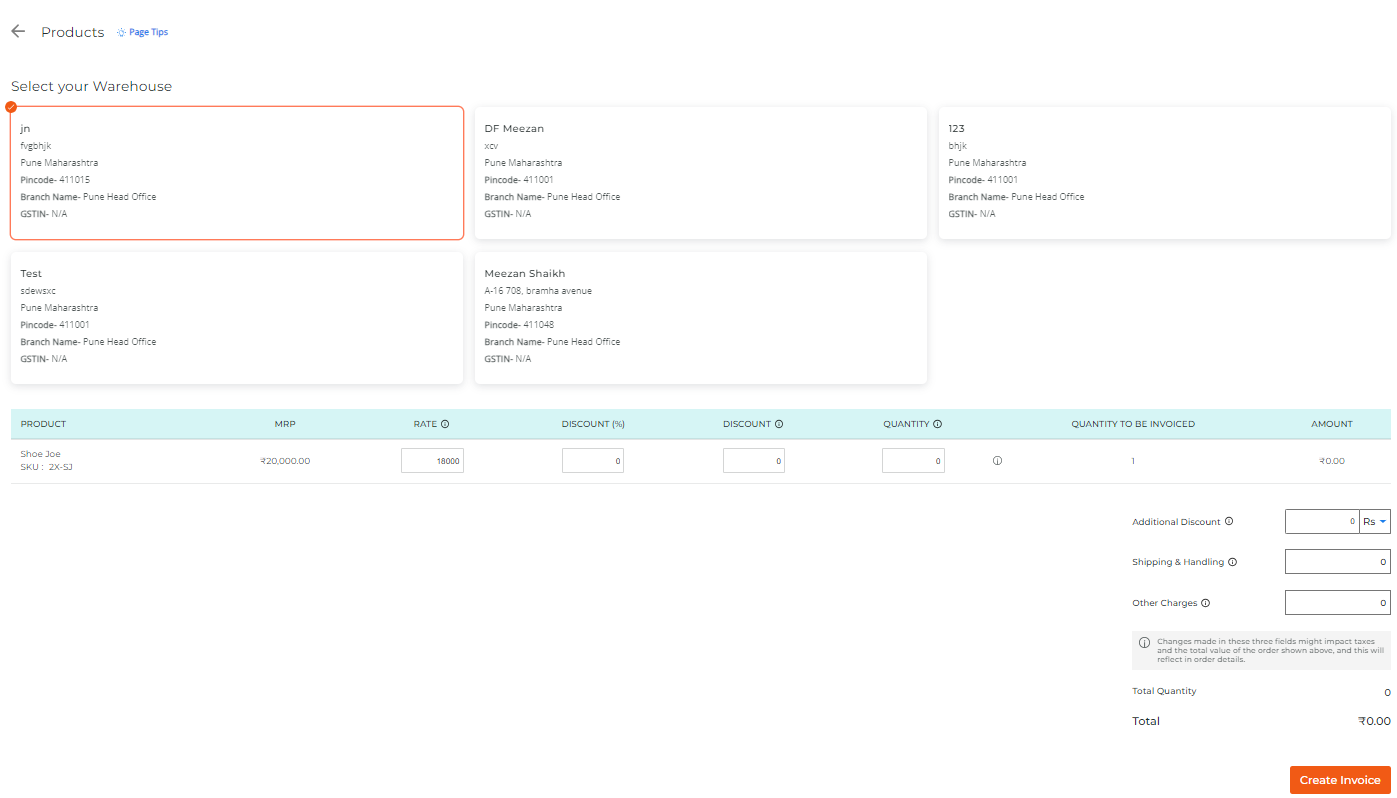
- Enter an additional discount amount or percentage if any. The additional discount won’t have any effect on the products rate or GST calculations.
- You would see a list of products that are available in the warehouse by clicking the "i" button below the quantity according to that then enter the quantity of the products that you would like to create an invoice for.
- Enter Shipping and Handling charges if any. This amount should be inclusive of all the taxes.
- Enter other charges if any. This amount should be inclusive of all the taxes
- Click Create invoice and your invoice would get generated.
Step 6: Add the Invoice Details:
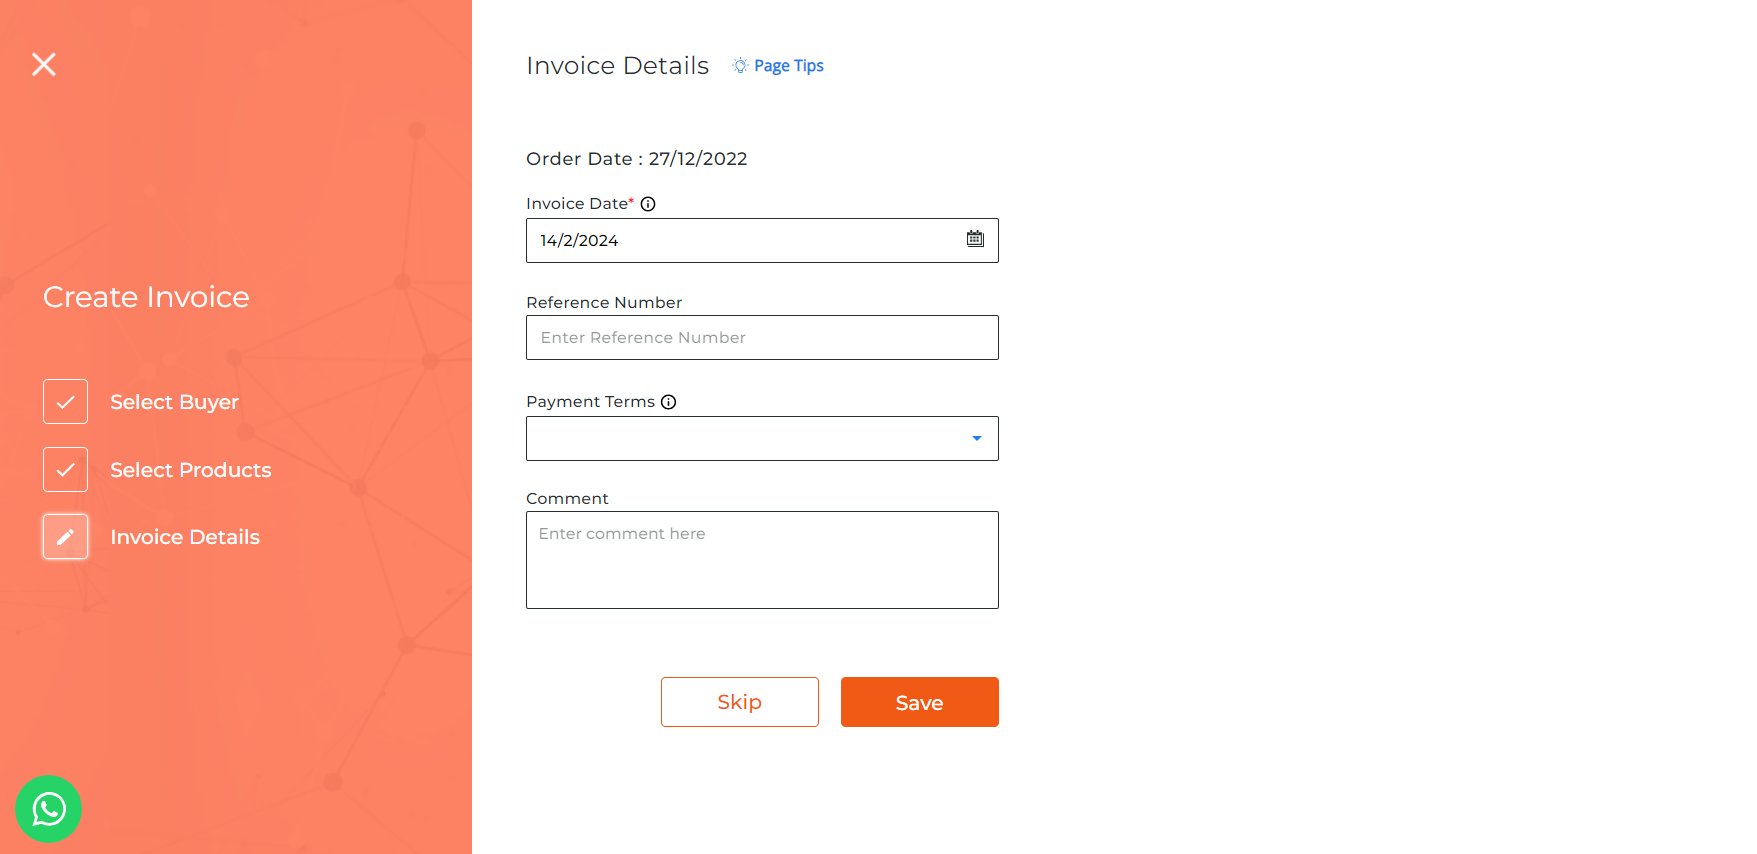
- Invoice Date: Enter the date that you want to print in the invoice. This date would resemble when the invoice was created. By default the present date would be patched, but it can be changed. Invoice Date cannot be before than the order date.
- Due Date: This date would resemble the latest date the buyer is allowed to make payment for this invoice.
- Payment Terms: Payment terms resemble the payment cycle of the buyer after an invoice is created. This would be initially the same that was selected during order, but it can be changed.
- Note/Comments: Any notes or comments that you would like the buyer to know. If any of the above details are not filled the default values would get printed on the invoice. Now click on "Save"
The invoice will be generated. You can download the invoice by clicking on the invoice button right between the edit button and the 3 dots. You can preview the invoice by clicking on the "Preview Invoice" button.
Edit an Invoice:
- If needed, edit the invoice details such as addresses, quantities, discounts, charges, dates, and payment terms.
Record Payment on the Invoice:
- Record any payments received against the invoice, specifying payment details and amounts.
Cancel an Invoice:
- In case of errors or cancellations, cancel the invoice to void it from the system.
Put in Marketing Expense:
- If an invoice is associated with marketing expenses, allocate it accordingly for accurate financial tracking.
Sync Invoice to Tally:
- Sync invoice data to Tally for seamless integration and accounting purposes.